Alas I haven't any fluff written for these guys, but I'll make up for that with a basic little how-to at the end! It's pretty basic stuff when it comes to kitbashing, but if I can help encourage anyone to give it a go then I'll count my job as done!
Besides, it only takes a couple of basic techniques to start making some really characterful and unique models :) as hopefully these guys will demonstrate :)
What's more Dark Eldar than a bloodied thigh-high boot made of someone else's skin?
This last Bloobride is the one that I'll run through the modelling techniques and some of the thought processes behind stuff. We start with the basic idea that I wanted to represent the extra attack that Bloodbrides get on the model themselves, and what better way than with another set of arms? :)
First off the tools of the trade :) Knife's a bit big, clippers aren't flat sided. Doesn't overly matter ;)
Might seem simple, but legs go down first. They're the only fixed part of a multi-pose model, so the whole pose will stem from what the legs look like.
Then bodies go on. I always find that putting a body on at a degree of rotation, even if it's just a slight one, helps with making a pose look both natural and dynamic. Since these guys are running full-tilt, they get quite a big degree of rotation. It's also good to vary up which way they face :)
Then, we get to the main bit I wanted to use in the first place. Razorflails!
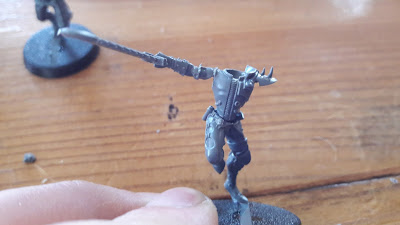
Here's where the trick to 4-armed stuff comes in. You cut off the rounded bit at the top of the shoulder to make a flat face like so:
...and stick it to the body using that new flat edge. That gap below we'll use to fit the lower arm.
Next I held up the other arm to test out where it sits normally, which won't quite work for us. Not only did it not really look in the right position compared to the other arm now (if in doubt about a pose, I find that physically acting it out helps you to get where your various body parts sit naturally), but there was also no space for the lower arm. A bit of holding it up in different places got to where I want it to be:
So, clip off the rounded end a bit again. I also found that there wasn't much space for the lower arm to wedge in so I shaved the underside of the arm joint to make is slimmer.
More holding it in place showed that it still didn't seem high enough, fouling on the leading edge of the shoulder pad so that had to go.
And glued in place :) with a space to wedge the lower arm in again :)
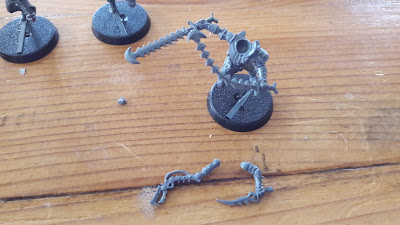
Now, if you were just reposing you could fill those gaps in with GS. But for these guys, we'll use these :)
Took a little bit of sifting through bits to get the right arms. One of the things I wanted to do on these is to have each pair of arms (upper and lower) mirror each other somewhat in pose. I tried just picking out cool arms, and they just look like they were flailing wildly windmilling all over the place. With paired poses, they look much more cohesive
So, hold it up in place to see what sort of angle you want to cut...
...cut the end of the arm into a wedge shape...
...realise you've cut it wrong and the arm's much further back in its swing than you planned...
...look at it from a couple of angles and decide that it looks cool anyway so glue it in place :)
With a bit of work shaping and trialling the wedge you can get it to fit quite snugly which will prevent the need for GS.
Then, repeat the procedure with the other arm :) hold in place to get the wedge shape. Cut it. Skim it down so it fits snugly and glue it in place :)
Last thing to go on is the head :) most of the time I'll spend a little while holding the head in different positions to see what looks cool, but this one was obvious. If he's hitting something with his sword then he's going to be looking at what he's hitting.
And done! So yeah, some really basic chopping and chamfering of bits and some thought about how various poses would actually look if you were doing them yourself and you can get something that looks really unique :)
Hope that was helpful/interesting!


No comments:
Post a Comment